Booting a Jetstream Computer Instance for your use!
What we’re going to do here is walk through starting up an running computer (an “instance”) on the Jetstream service.
Below, we’ve provided screenshots of the whole process. You can click on them to zoom in a bit. The important areas to fill in are circled in red.
Some of the details may vary – for example, if you have your own XSEDE account, you may want to log in with that – and the name of the operating system or “image” may also vary from “Ubuntu 14.04.03” depending on the workshop.
First, go to the Jetstream application at https://use.jetstream-cloud.org/application.
Now:
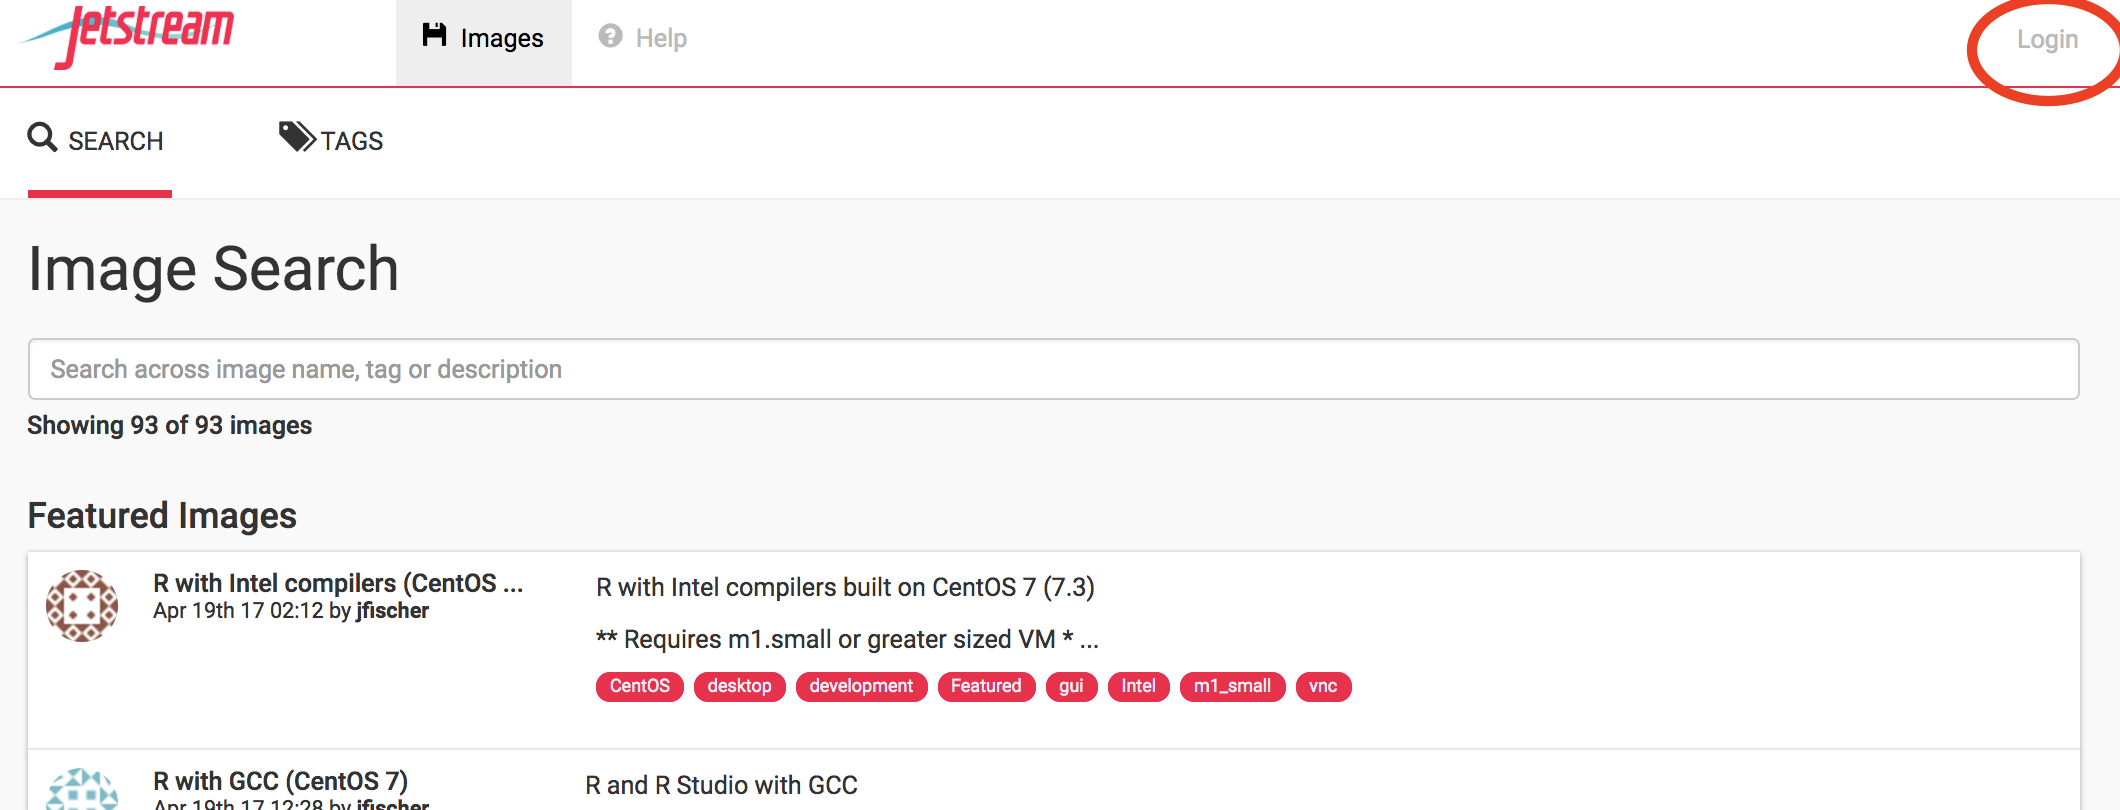
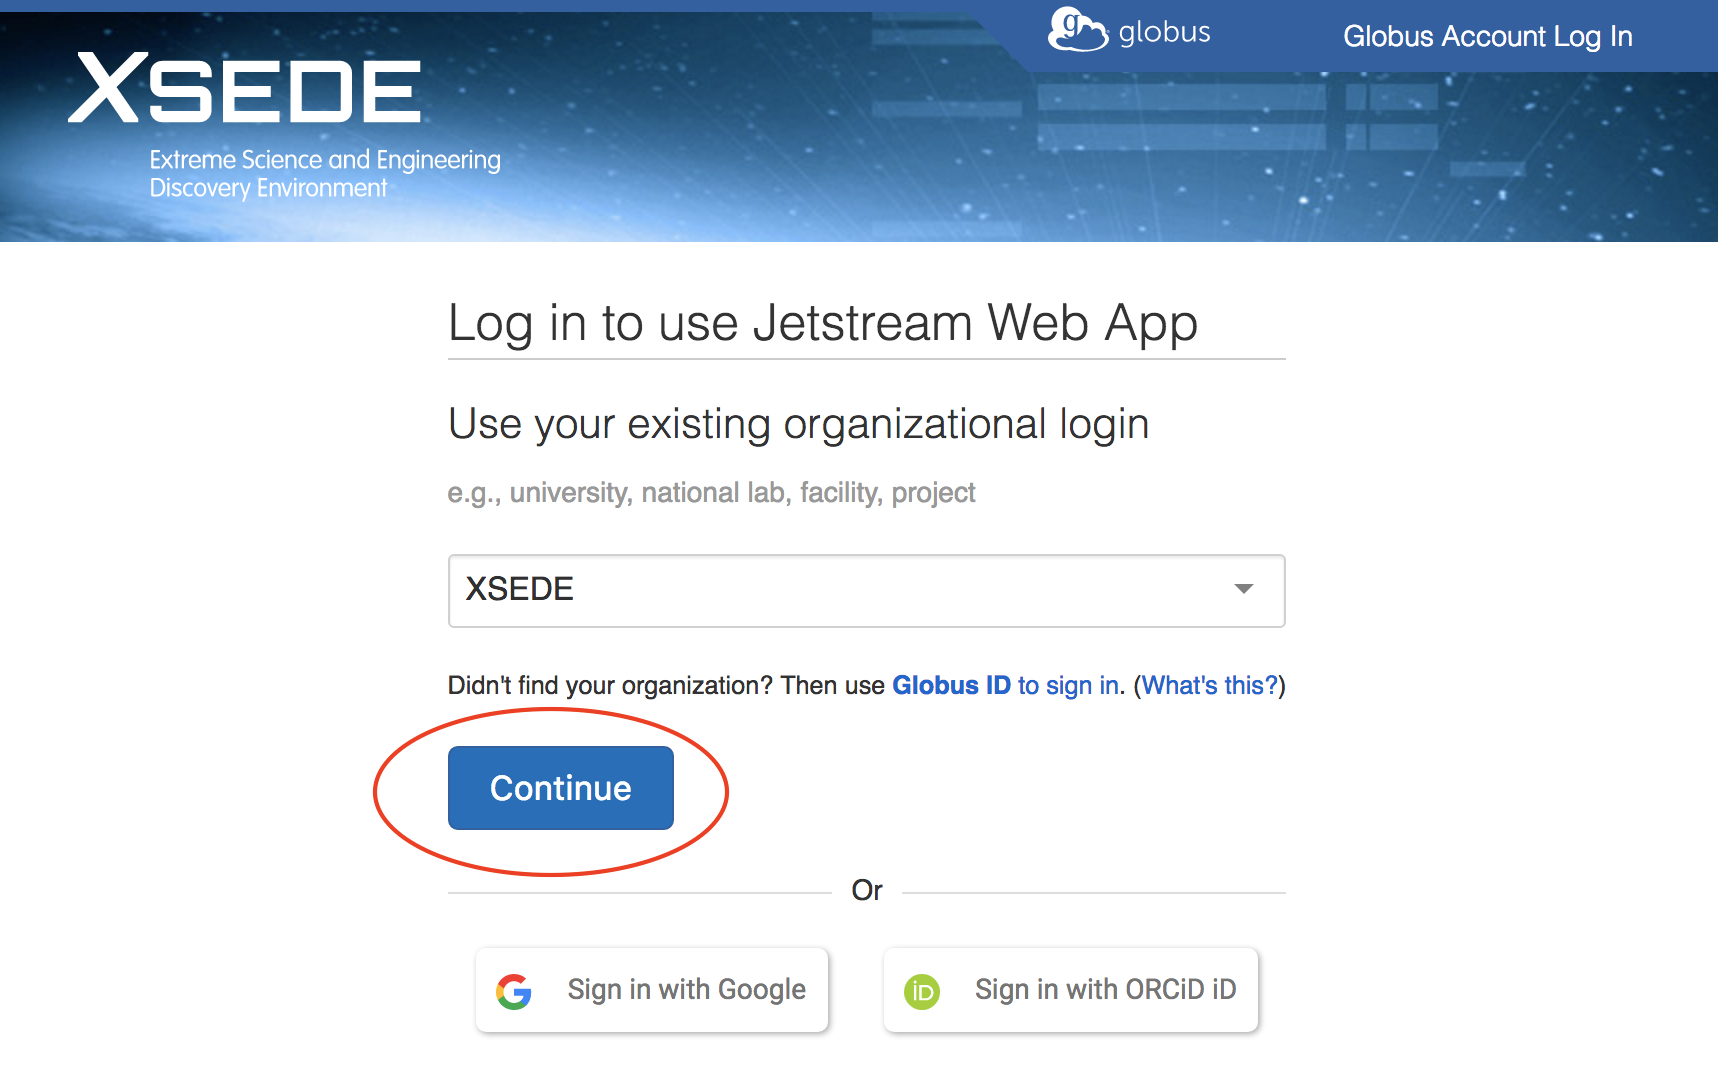
Use “XSEDE”
Choose “XSEDE” as your account provider (it should be the default) and click on “Continue”.
Fill in the username and password and click “Sign in”
Fill in the username, which is ‘tx160085’ for the UCSC workshop, and then enter the password (which we will tell you in class).

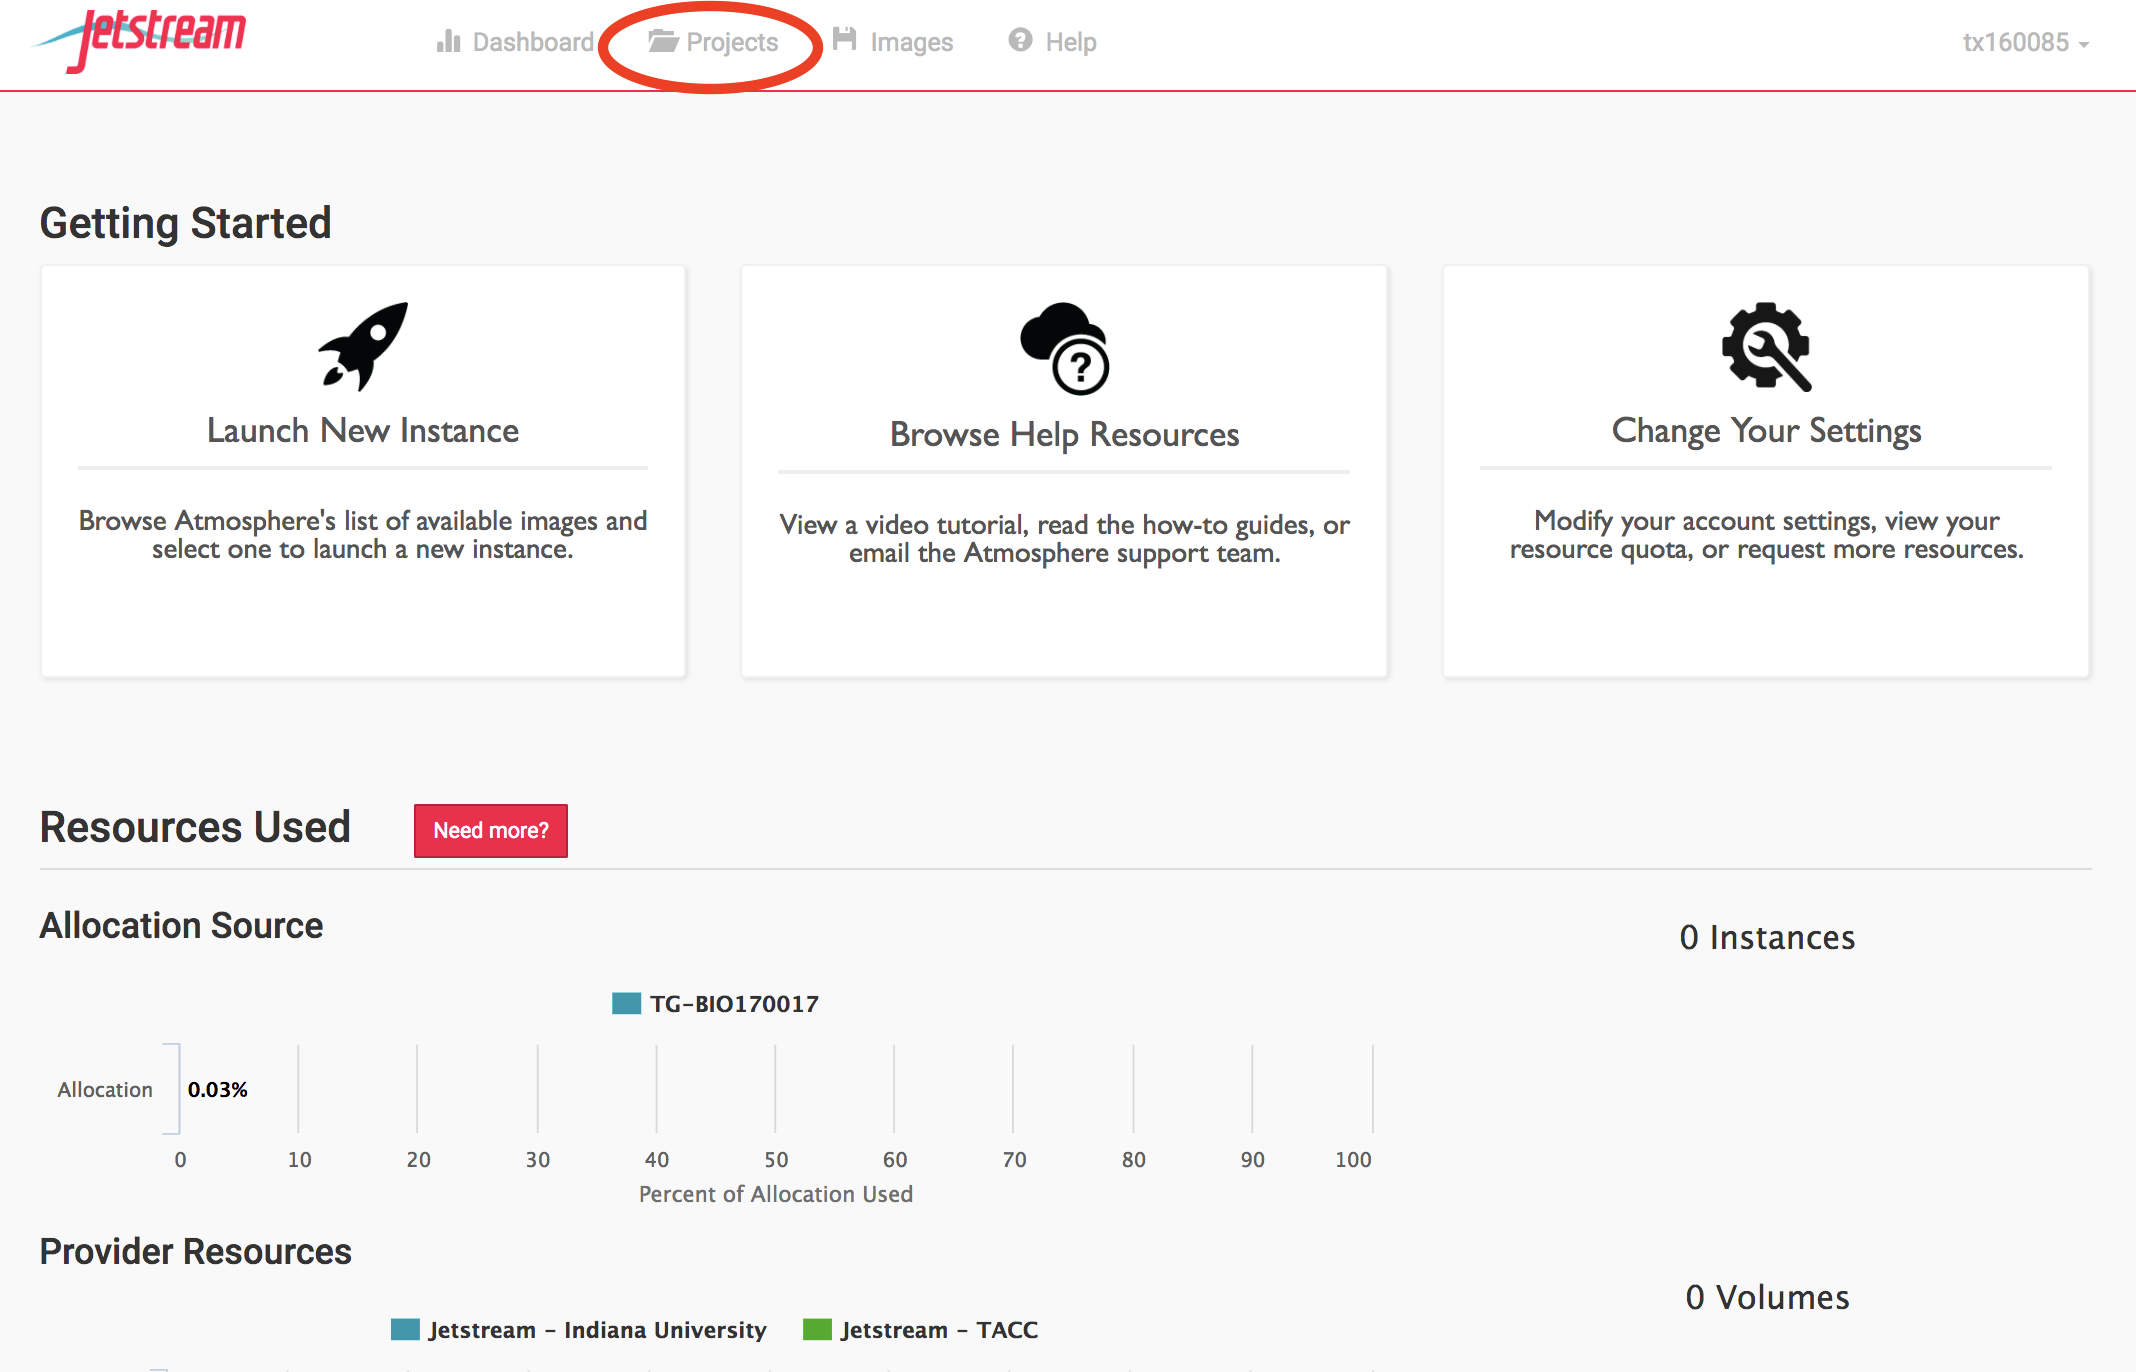
Select Projects and “Create New Project”
Now, this is something you only need to once if you have your own account - but if you’re using a shared account like tx160085, you will need a way to keep your computers separate from everyone else’s.
We’ll do this with Projects, which give you a bit of a workspace in which to keep things that belong to “you”.
Click on “Projects” up along the top.
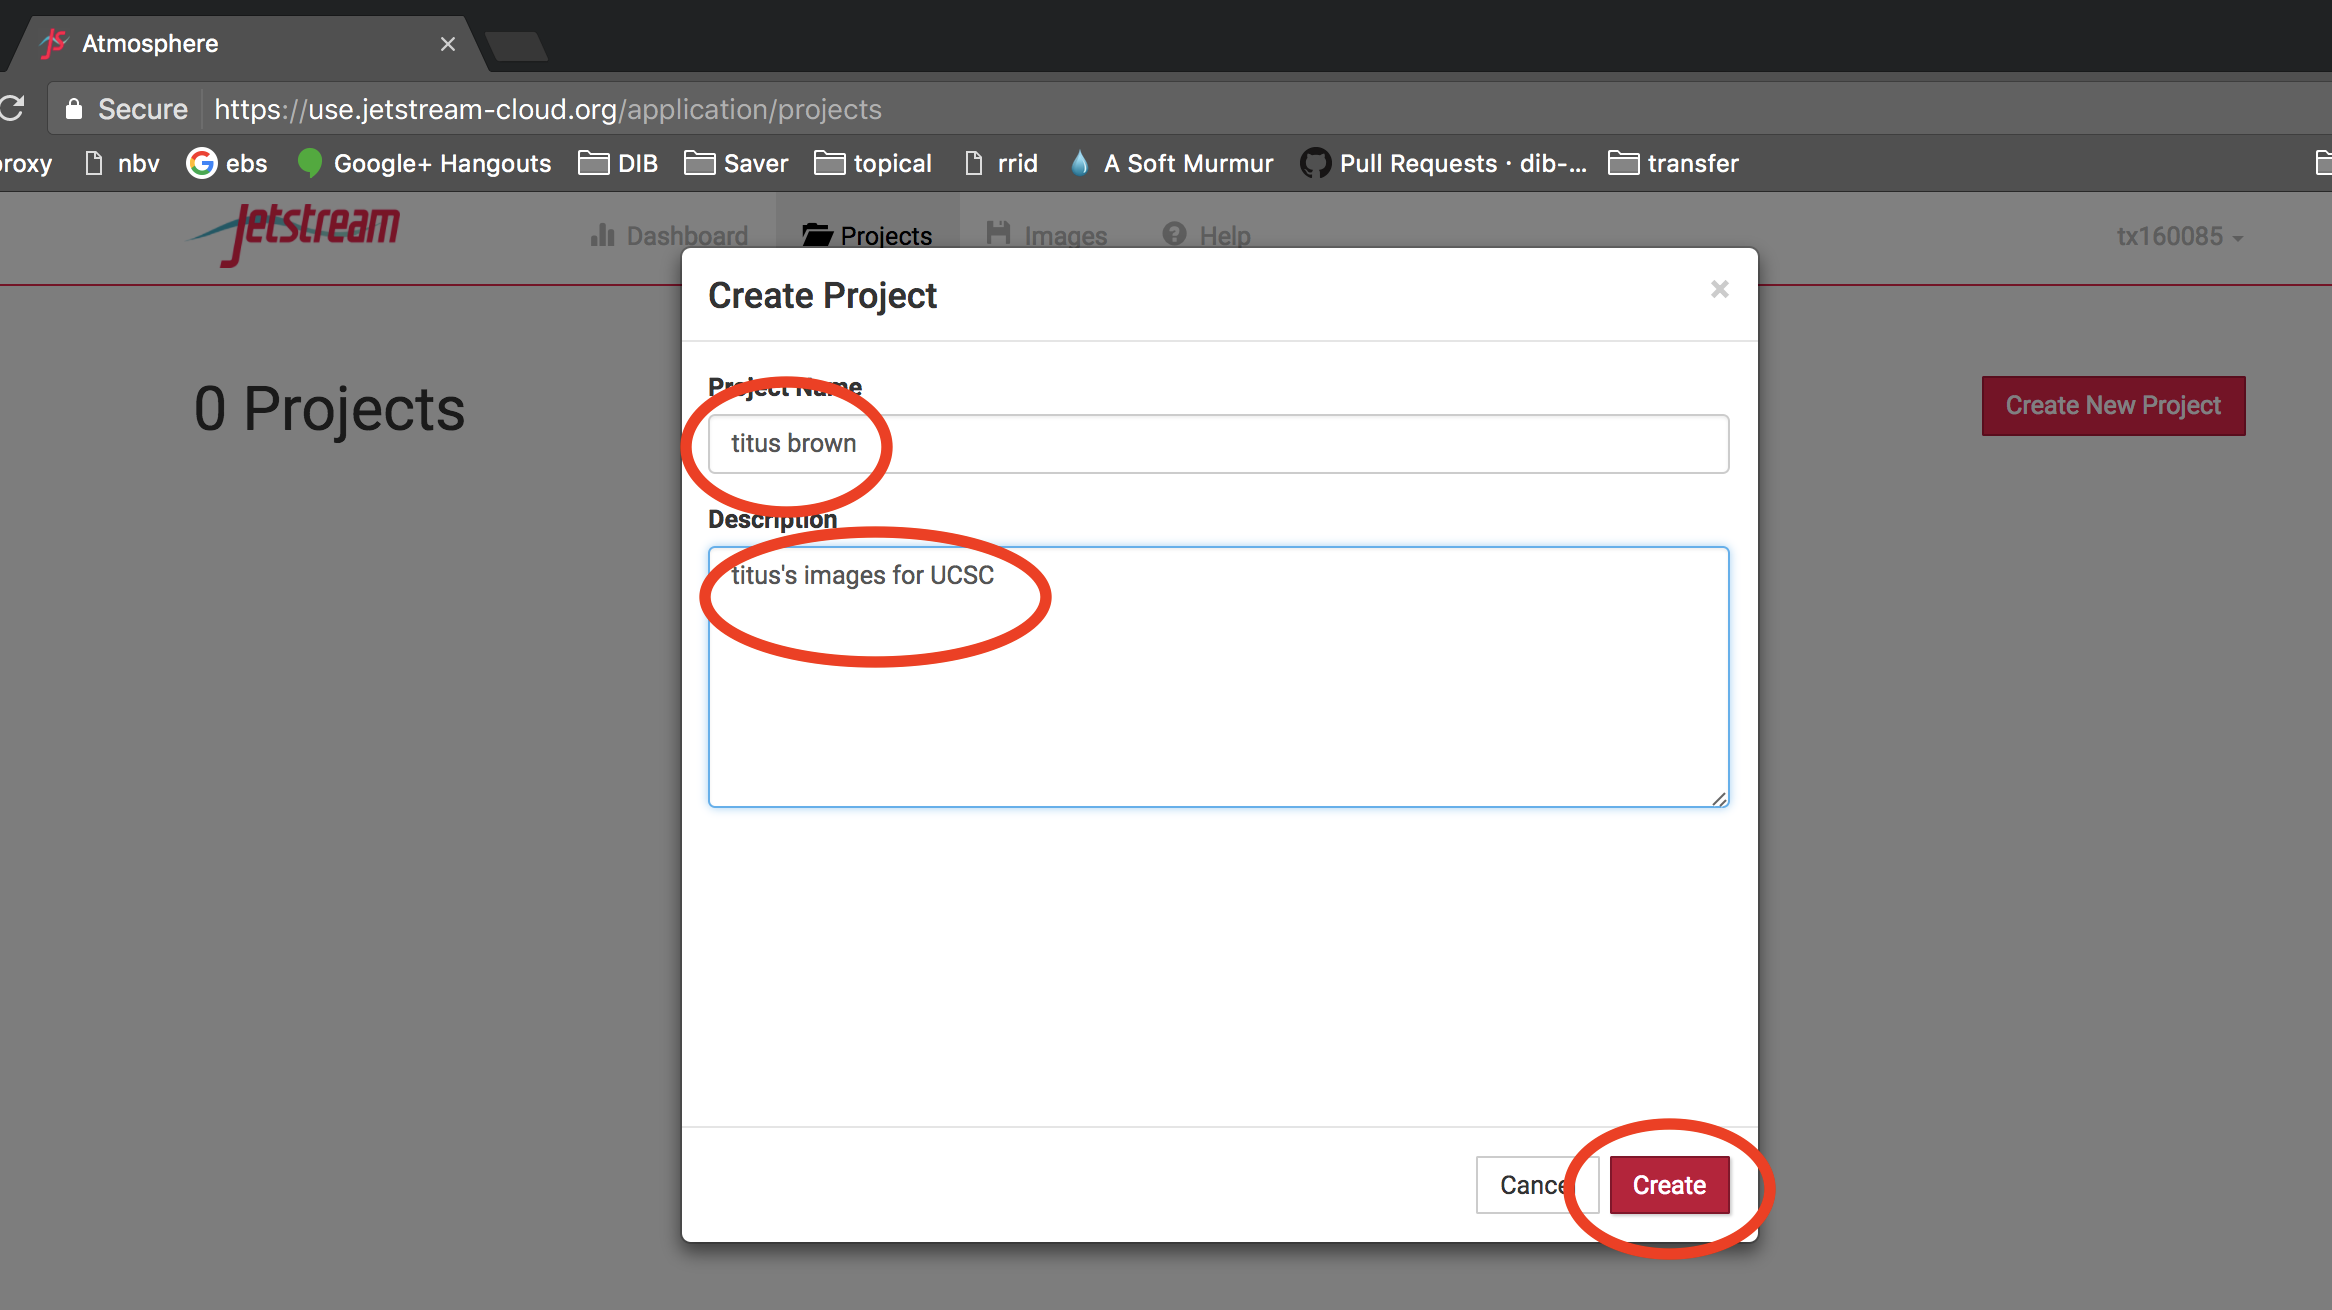
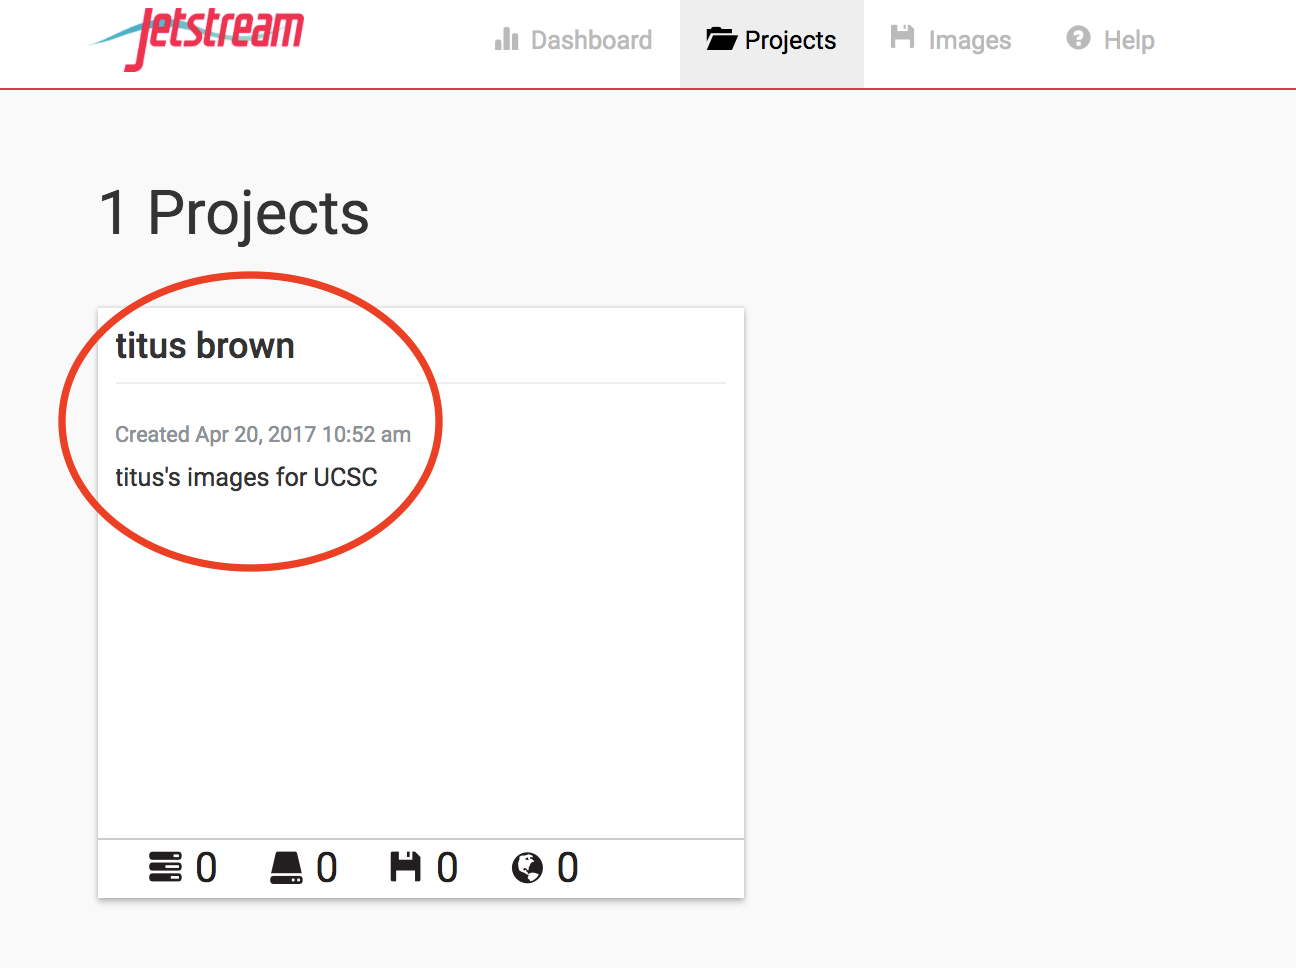
Name the project for yourself, click “create”
Enter your name into the Project Name, and something simple like “UCSC” into the description. Then click ‘create’.

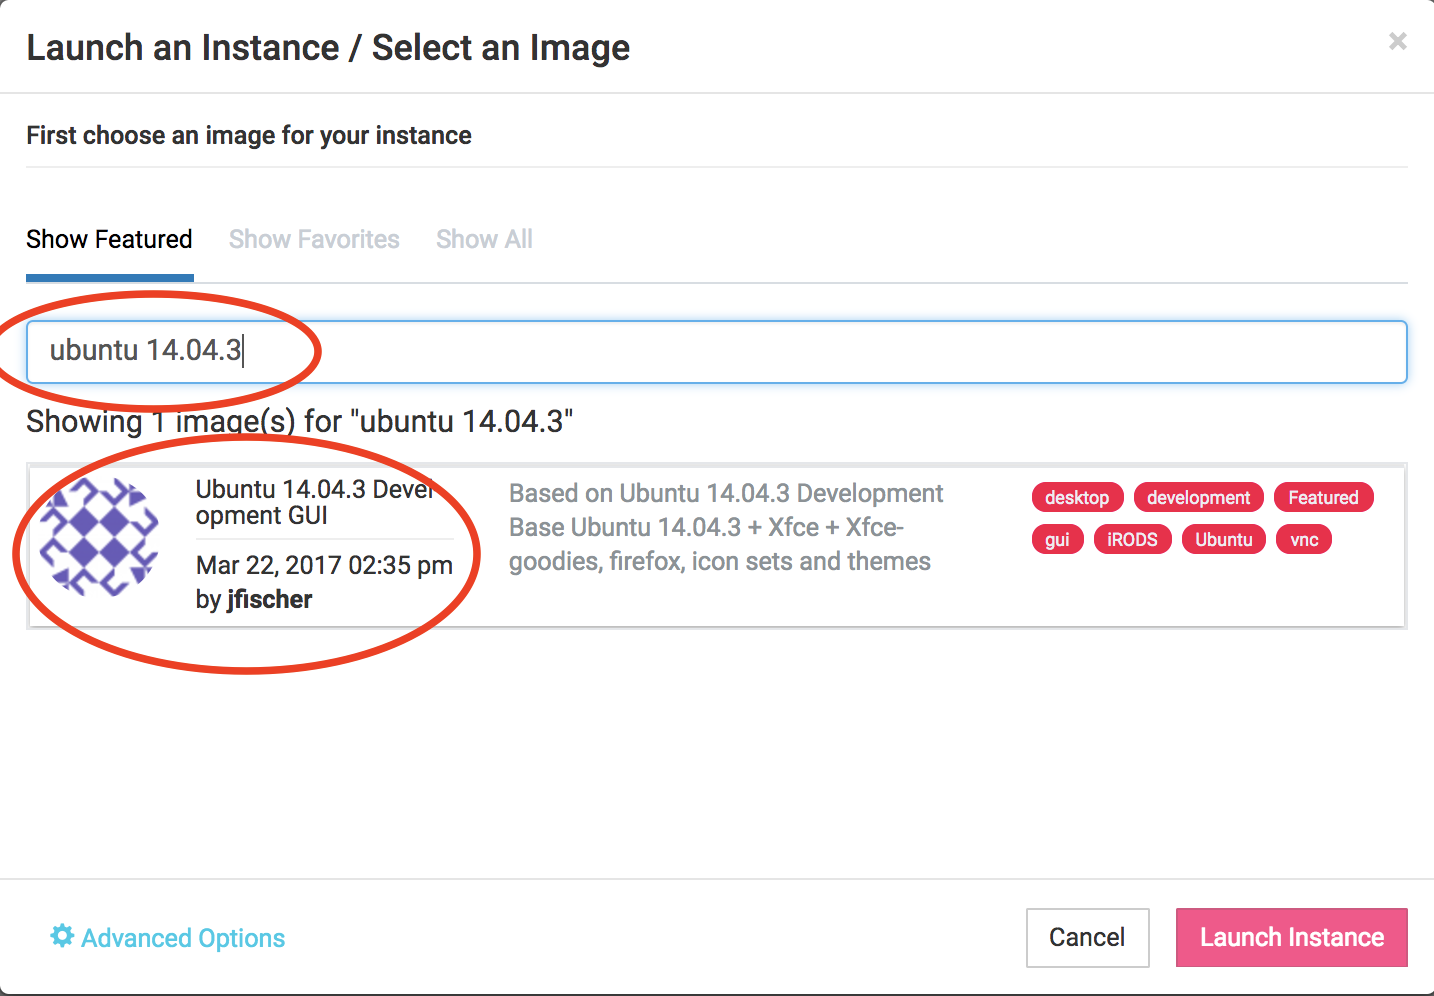
Find the “Ubuntu 14.04.3” image, click on it
Enter “Ubuntu 14.04.3” into the search bar - make sure it’s from March 22nd, 2017.
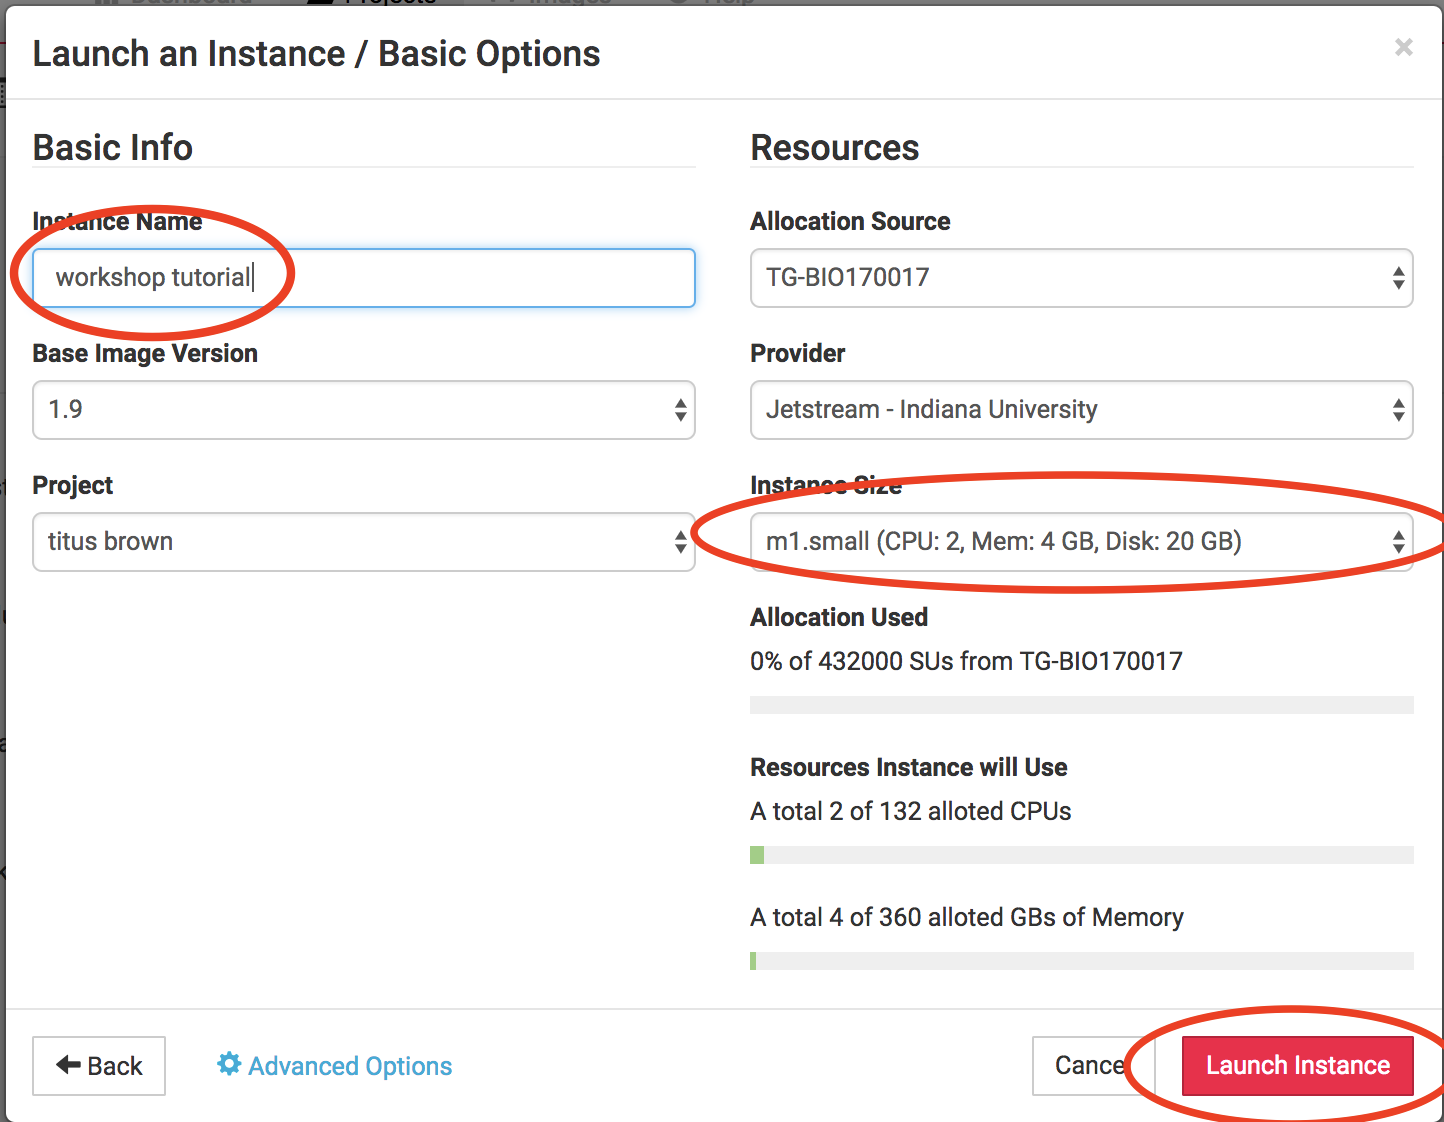
Name it something simple and select ‘m1.medium’
Change the name after what we’re doing - “UCSC workshop”, for example, but it doesn’t matter – and select ‘m1.medium’.
Wait for it to become active
It will now be booting up! This will take 2-10 minutes, depending. Just wait! Don’t reload or anything.

Click on your new instance to get more information!
Now, you can either click “Open Web Shell”, or, if you know how to use ssh, you can ssh in as user ‘tx160085’ on the IP address of the machine - see circled information below. Note that you’ll need to use the private key file we sent around to everyone in last the pre-workshop e-mail.

LICENSE: This documentation and all textual/graphic site content is released under Creative Commons - 0 (CC0) -- fork @ github.